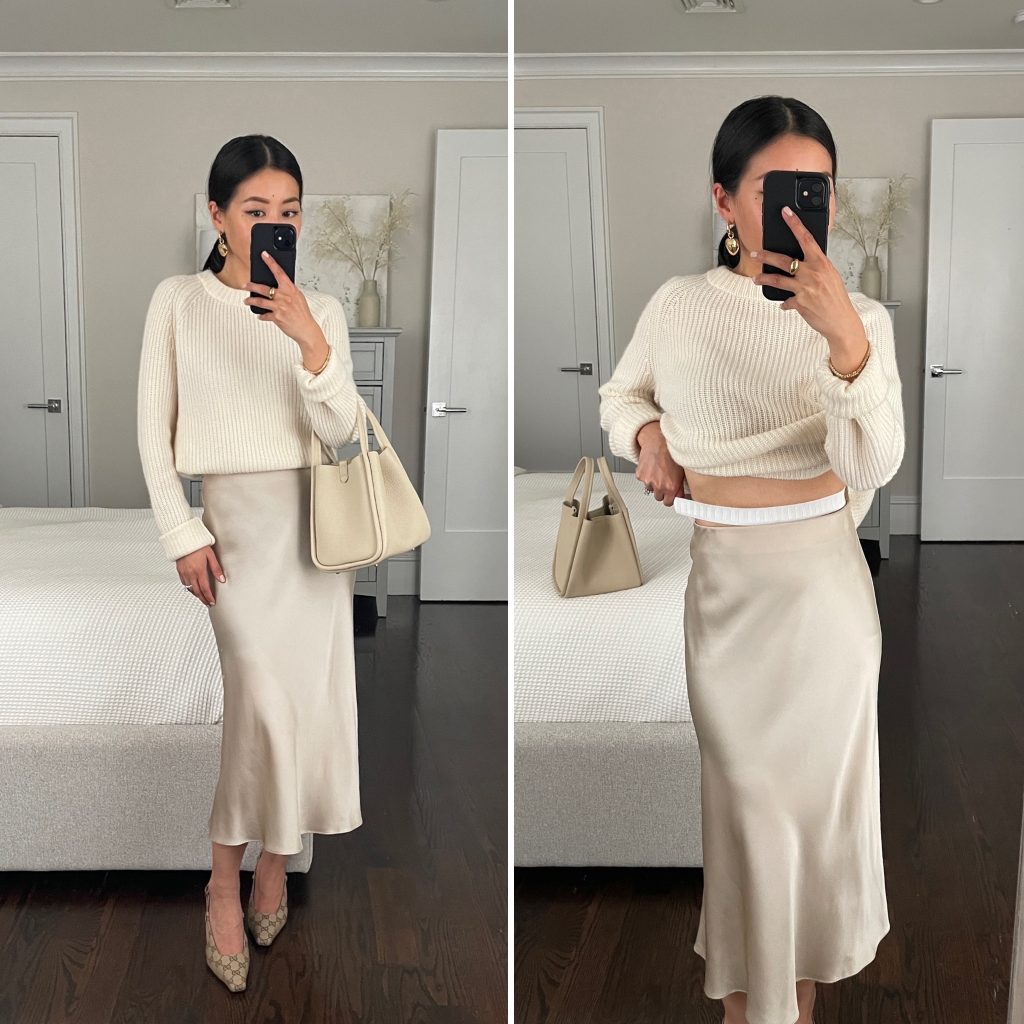
Continuing from my last post on slip skirt outfit ideas, I wanted to share a super easy DIY that’s solved several of my top tucking issues! Tuck bands have been around for a while and rose to popularity with Tik Tok’ers using them to style oversized tee shirts into a crop top. I love using them to achieve a no-bulk tuck with thicker or longer tops, and they also work well to achieve a layered look (like with a cropped sweater over a longer button-up shirt).
Instead of tucking your top into your bottoms, you simply flip the shirt upwards and tuck it under this band instead. It’s similar in concept to the infamous bra band tuck but addresses the problems of that hack for me. My everyday bra bands were too stretchy to securely hold a tucked sweater, also any arm movements would result in a flash of belly – not a good option for work.
There’s several companies that sell a tuck band / crop band but it takes under 10 minutes to make – even quicker if you have a sewing machine! The ones sold online are usually made in a skin tone color and thicker, wider elastic band, so might be worth getting if you can’t bring yourself to sew. I haven’t tried any so if you own a brand that works well, please feel free to share!
DIY sweater / shirt tucking band
1. Take a piece of wide soft elastic, at least 1 inch wide, and measure out a piece to fit around your waist. You want it to be semi snug around your waist without being uncomfortably tight to wear all day. Allow an inch of extra length for overlapping each end.
2. Cut the elastic to size, and if it looks the ends might fray, apply some anti fray or clear nail polish to seal the edges.
3. Let dry and then sew the 2 ends together. This would take 30 seconds if you have a sewing machine, and was under 5 min for me to sew by hand.
Thats all there is to it! You can see my latest IG video for how I use mine.
Used the tucking band trick for this look here!
